LAST MEDICALLY REVIEWED:
August 2026 — Dr. Shaileshkumar Garge
Citi Vascular Hospital, KPHB Colony, Road No. 1, Hyderabad, Telangana 500072
|
QUICK ANSWER How Is Osteoid Osteoma Ablation Performed — Step by Step? Osteoid osteoma ablation is a 10-step CT-guided procedure: pre-procedure imaging → CT nidus localisation → patient positioning → anaesthesia → percutaneous needle placement under CT guidance → nidus confirmation → energy delivery (RFA or microwave) → real-time monitoring → applicator removal → recovery and same-day or next-day discharge. No open surgery. No large incision. Most patients are home within 24 hours and pain-free within days. Dr. Garge FRCR (UK) | Citi Vascular Centre, KPHB, Hyderabad | +91-73375 83901. |
Understanding exactly what happens during an osteoid osteoma ablation procedure — from the moment you arrive at the centre to the moment you go home — removes the uncertainty that is often more anxiety-provoking than the procedure itself. Many patients, particularly those with children being treated, find that knowing each step makes the experience far more manageable than expected.
Osteoid osteoma ablation is the collective term for a group of image-guided thermal treatment techniques — including radiofrequency ablation (RFA), microwave ablation (MWA), and, less commonly, cryoablation — all of which destroy the osteoid osteoma's nidus using a precisely controlled energy source delivered through a needle placed under CT guidance. The unifying principle across all techniques is the same: localise the nidus accurately using CT, reach it with a needle through the smallest possible access, confirm position, deliver the ablative energy, and monitor the process in real time to confirm adequate treatment. This page is your complete procedure guide — covering all thermal ablation techniques for osteoid osteoma, not limited to RFA. For a detailed comparison of RFA specifically versus microwave ablation, see our dedicated Osteoid Osteoma RFA page.
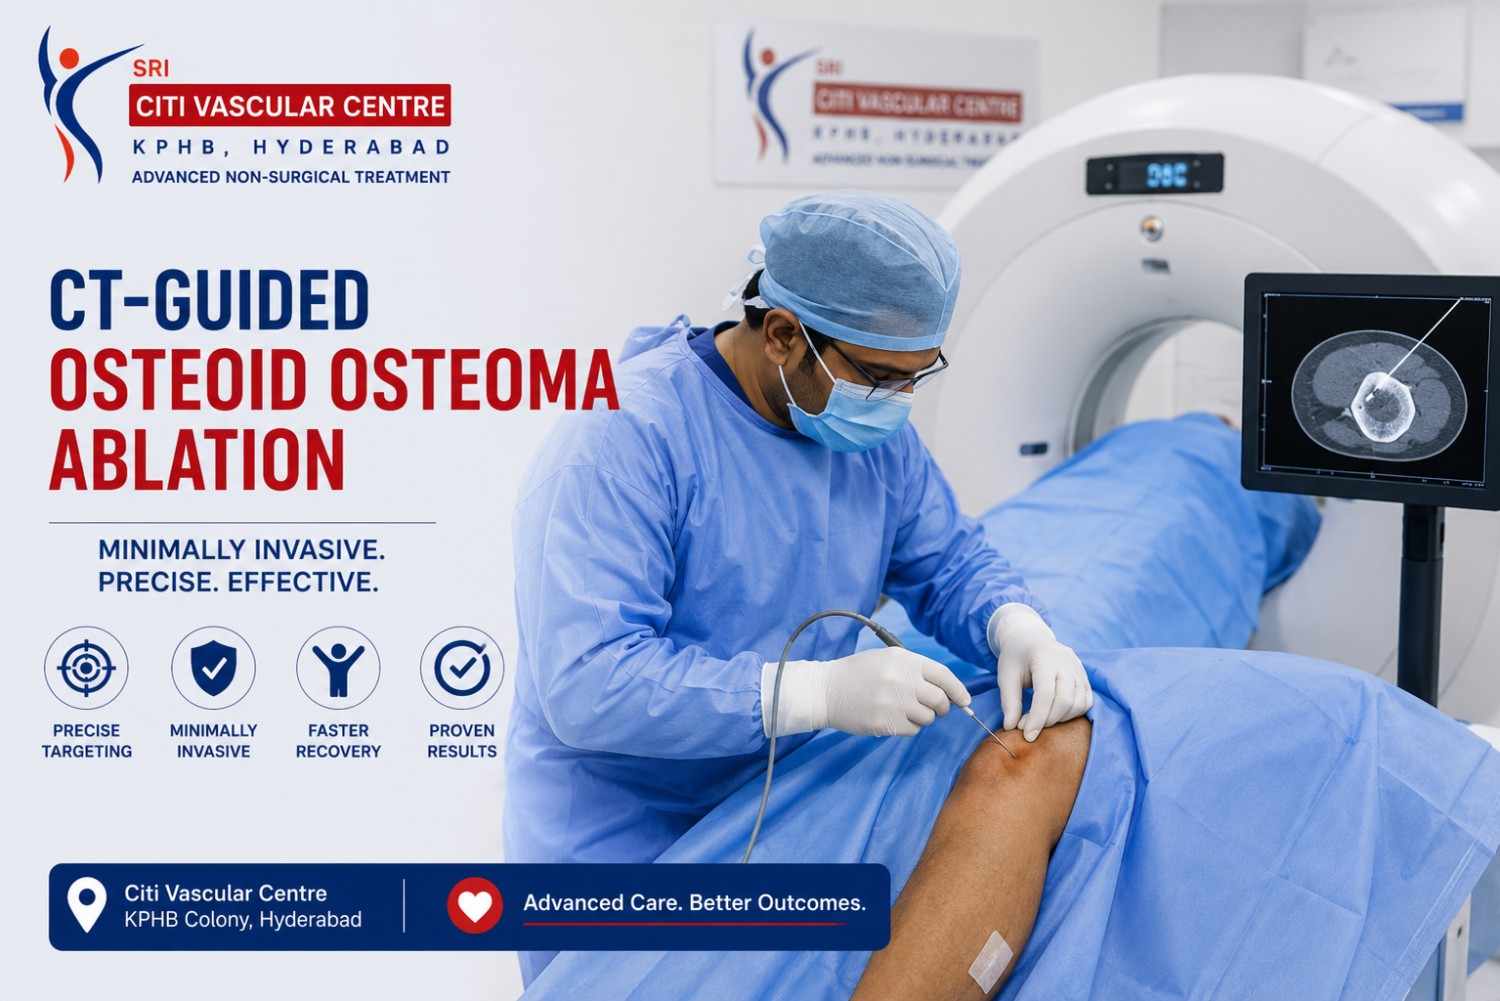
Osteoid Osteoma Ablation — Citi Vascular Centre, KPHB, Hyderabad
Call +91-73375 83901 | WhatsApp 73375 83901 | citivascularcentre.com | Mon–Sat 9AM–6PM
Book your Appointment here: | Appoinment: |Call +91-7032508468| Whatsapp:+91-7337583901
|
Feature |
Detail |
|
Procedure Type |
Percutaneous image-guided thermal ablation — minimally invasive, no open surgery |
|
Techniques Available |
Radiofrequency ablation (RFA) | Microwave ablation (MWA) | Cryoablation (selected cases) |
|
Imaging Guidance |
CT throughout — planning, needle placement, nidus confirmation, post-ablation check |
|
Anaesthesia |
General anaesthesia (most children + complex adult cases) | Conscious sedation (selected adults) |
|
Skin Access |
Percutaneous — tiny needle entry, no surgical incision |
|
Procedure Duration |
30–90 minutes including imaging, needle placement, ablation, and removal — varies by location and complexity |
|
Hospital Stay |
Same-day discharge (most patients) or next-morning discharge for complex cases or young children |
|
Pain Relief |
Begins within 24–72 hours of successful ablation in most patients | Often complete within 1–4 weeks |
|
Weight-Bearing Restriction |
4–6 weeks for weight-bearing bone locations | Shorter or absent for upper limb and non-weight-bearing sites |
|
Follow-Up |
Clinical review at 4–6 weeks | CT or MRI if symptoms persist or recur |
The word 'ablation' means the destruction of tissue — and in the context of osteoid osteoma, the target tissue is the nidus. Three percutaneous ablation modalities are used for osteoid osteoma, all delivered through CT-guided needle access:
|
Technique |
Energy Source |
Clinical Notes |
|
Radiofrequency Ablation (RFA) |
Radiofrequency alternating current → ionic friction → heat |
Longest-established technique for osteoid osteoma. Systematic review of 3,023 patients demonstrates ~96% primary success. Standard first choice at most experienced centres. |
|
Microwave Ablation (MWA) |
Electromagnetic microwaves → dielectric heating of tissue water → heat |
Newer technique with comparable success rates to RFA in recent comparative studies (95.8% in 2025 systematic review). Potentially faster ablation zone creation. Growing evidence base. |
|
Cryoablation |
Argon gas expansion → extreme cold → iceball → cell destruction |
Used in selected situations — particularly where thermal protection of adjacent nerves is critical (near spinal cord, major peripheral nerves). Cold ablation zone may be safer near neural structures than heat-based techniques. |
For the purposes of the procedure description that follows, the steps are applicable to all thermal ablation techniques — the patient preparation, positioning, CT planning, and needle placement steps are identical regardless of whether RFA, microwave, or cryo energy is ultimately delivered. The energy delivery and monitoring step (Step 7 below) differs between techniques but the overall procedural structure is the same. The choice of technique is made by Dr. Garge at consultation after reviewing the CT and considering the nidus location, adjacent structures, and patient-specific factors.
CT is not simply the 'guidance' tool used during needle placement — it is an integral part of every stage of the osteoid osteoma ablation process. Understanding what CT is doing at each stage helps patients appreciate why it takes time and why skipping or rushing any CT step would compromise both accuracy and safety.
|
CT Phase |
Purpose |
|
Pre-Procedure Diagnostic CT |
Identifies and characterises the nidus — its size, shape, exact location within the bone, depth below the skin, surrounding reactive sclerosis, and relationship to the nearest joint, nerve, and skin surface. This CT (usually done at an earlier visit or on the procedure day) is the primary treatment planning tool. |
|
CT-Based Access Planning |
Determines the optimal needle entry point on the skin surface, the angle of approach, and the depth of bone that must be traversed to reach the nidus centre. Planning includes identification of any anatomical hazard along the needle track — nerve, vessel, tendon, or joint capsule — and modification of the approach to avoid these structures. |
|
Procedural CT — Stepwise Needle Advancement |
CT images are acquired at each stage of needle advancement — typically after the needle tip has been advanced 1–2cm through bone — to confirm the needle is on the planned trajectory and has not deviated. This stepwise CT guidance distinguishes precision CT-guided ablation from 'freehand' approaches. |
|
Nidus Confirmation CT |
Once the needle tip is at the estimated depth of the nidus, a dedicated CT acquisition confirms position within the nidus lumen. This is the most critical CT acquisition in the entire procedure — energy delivery should not begin until nidus position has been confirmed on CT. |
|
Post-Ablation CT |
Performed after energy delivery and before probe removal to assess the ablation zone and confirm that the nidus has been adequately targeted. Also identifies any immediate complications — bone crack, haematoma, skin change — before the patient leaves the scanner table. |
|
Standard Ablation Approach Single confirmed nidus | Accessible location in cortical bone | Nidus > 2mm from skin surface | Distance from named nerve allows safe thermal margin | Diagnosis sufficiently established on CT | Patient fits for planned anaesthesia | No active infection at access site |
Requires Additional Planning Nidus adjacent to a major nerve (consider cryoablation or hydrodissection) | Intra-articular or periarticular lesion | Very superficial nidus near skin | Spinal osteoid osteoma (proximity to spinal cord) | Uncertain diagnosis (consider biopsy) | Lesion in growth plate zone of a child |
Note on spinal osteoid osteoma: Vertebral and posterior arch osteoid osteomas require particularly careful planning because of proximity to the spinal cord, exiting nerve roots, and the epidural space. Cryoablation may be preferred over thermal ablation in selected spinal cases. Hydrodissection — injection of dilute local anaesthetic or saline to displace the nerve away from the ablation zone — is a supplementary technique used in both spinal and peripheral nerve-adjacent cases. Dr. Garge reviews each case individually before selecting the technique and protective measures. Call +91-73375 83901.
Book your Appointment here: | Appoinment: |Call +91-7032508468| Whatsapp:+91-7337583901
The following 10-step description applies to standard CT-guided percutaneous thermal ablation at Citi Vascular Centre, KPHB. Individual steps may be modified based on the lesion's location, the patient's age, and the specific technique planned. Ask Dr. Garge at your pre-procedure consultation if you have questions about any step.
|
1 |
Pre-Procedure Review and Consent On the procedure day, Dr. Garge reviews the most recent CT images directly — confirming the nidus position, its relationship to adjacent structures, the planned access route, and the technique to be used. Any last-minute imaging or blood test results are reviewed. Written informed consent is completed, covering the procedure steps, expected outcome, and possible complications. All questions from the patient or family are answered before the procedure begins. |
|
2 |
Patient Positioning on the CT Table You are positioned on the CT scanner table in the orientation that provides the best and safest access to the nidus. For femoral or tibial lesions, this is often lying flat on your back or front. For spinal lesions, prone positioning is standard. Positioning accuracy matters — the planned needle entry point must be accessible to the operator while the patient is within the CT gantry. The skin over the planned entry point is marked and prepared. |
|
3 |
Anaesthesia Induction For most children and many adults, general anaesthesia (GA) is administered by the anaesthetist at this point. The patient is then intubated and monitored throughout the procedure. For cooperative adults where the lesion is in an accessible location and the procedure is expected to be brief, conscious sedation (intravenous midazolam and fentanyl) allows the patient to remain awake and cooperative while comfortable and analgesed. Local anaesthetic is also infiltrated into the skin and soft tissue at the planned entry point in all cases. |
|
4 |
CT Acquisition — Procedural Planning Scan With the patient positioned and anaesthetised, a CT acquisition is performed over the lesion area. This procedural planning scan confirms the nidus position with the patient in the actual treatment position — which may differ slightly from the diagnostic CT that was performed at a different appointment. The needle entry point on the skin is confirmed, the access depth is measured precisely, and the final needle trajectory is planned using the CT console's planning tools. |
|
5 |
Skin Preparation and Sterile Draping The planned entry area is cleaned with antiseptic solution and sterile drapes are applied around it. A small local anaesthetic injection is made at the entry point if not already done. The operator applies sterile gloves and gown. The CT table is moved into a position that allows needle advancement while the gantry is accessible for repeated CT acquisitions. |
|
6 |
Percutaneous Bone Access — Stepwise Under CT Guidance A bone access needle — typically a coaxial system with an outer introducer needle and an inner stylet — is advanced through the skin towards the bone surface at the planned entry point. Once the needle contacts the periosteum (bone surface), a CT acquisition confirms the tip position before any bone penetration. The needle is then advanced through the bone cortex towards the nidus — using manual or drill-assisted rotation depending on the bone's hardness. CT acquisitions are repeated at each step to verify trajectory and depth. This stepwise approach typically takes 10–20 minutes for a standard femoral or tibial nidus. |
|
7 |
Nidus Confirmation — Critical CT Step When the needle tip has reached the calculated depth of the nidus, a CT acquisition specifically confirms whether the tip is within the nidus lumen. On CT, the nidus appears as a small lucent (dark) area within the reactive sclerosis — and the needle tip should be visible within this dark zone. This confirmation step is non-negotiable: energy delivery should not proceed if the needle tip is not confirmed within the nidus. If the position is incorrect, the needle is adjusted and CT is repeated before proceeding. |
|
8 |
Ablation Energy Delivery The ablation applicator is connected to the energy generator. Energy delivery begins under the operator's supervision — the generator's display shows real-time temperature or power being delivered at the applicator tip. For RFA, the temperature typically rises to 85–90°C and is maintained for a defined duration (usually 4–6 minutes). For microwave ablation, the power and duration are set according to the planned ablation zone. For cryoablation, a freeze-thaw-freeze cycle is applied. The operator adjusts energy delivery in response to the real-time monitoring display to ensure adequate ablation within the planned zone. |
|
9 |
Post-Ablation CT and Applicator Removal At the end of the planned energy delivery, a CT acquisition assesses the ablation zone — confirming coverage of the nidus and looking for any immediate complications such as bone fracture, skin injury, or gas formation at the ablation site. If coverage is adequate, the applicator is removed through the same access channel. A final CT confirms the bone access channel and that no significant haematoma has accumulated. The tiny skin entry point is dressed with a simple adhesive dressing — no stitches. |
|
10 |
Recovery, Observation, and Discharge You are moved to the recovery area. The anaesthesia team monitors your vital signs and pain level during emergence from GA or recovery from sedation. Pain at the procedure site over the first 24–48 hours is expected — analgesics are prescribed. Weight-bearing guidance (for lower limb lesions) and activity restrictions are explained verbally and in writing. Most patients are discharged home the same day or the following morning with written instructions, a contact number for concerns, and a planned follow-up appointment. |
During the ablation energy delivery phase, the operator monitors several parameters simultaneously to ensure the procedure is both effective and safe. Understanding what is being monitored helps patients appreciate why the operator is focused on the generator screen and why the energy delivery phase requires quiet and stillness from the patient.
|
Monitoring Parameter |
What It Means |
|
Temperature at applicator tip (RFA) |
The generator displays the real-time temperature being reached at the probe tip. Target is typically 85–90°C. If temperature rises too quickly (tissue carbonisation risk) or too slowly (inadequate heating), power is adjusted in real time. |
|
Power output (Microwave) |
Microwave generators display watts of power being delivered per second. The operator selects the planned power and duration based on the desired ablation zone size — monitoring for any unexpected impedance change or probe fault. |
|
Impedance (RFA) |
Electrical impedance at the probe tip reflects the tissue's resistance to current flow. A sudden impedance rise indicates tissue carbonisation — prompting the operator to reduce power or pause ablation. |
|
Patient vitals — from anaesthesia team |
Blood pressure, heart rate, oxygen saturation, and temperature are monitored continuously throughout by the anaesthesia team — not by the IR operator, allowing each clinician to focus on their specific responsibility. |
|
Ablation duration |
The operator runs a planned ablation for the pre-calculated duration — typically 4–6 minutes for RFA, shorter for microwave — then ends the energy delivery and immediately repeats CT to assess the result before probe removal. |
|
Timeframe |
What to Expect |
|
Procedure Day |
Recovery from Anaesthesia 1–3 hours in the recovery area before discharge. Mild-to-moderate pain at the procedure site is expected as the local anaesthetic wears off. Paracetamol and prescribed NSAIDs manage this effectively. Most patients describe the post-procedure pain as different in character — more like a 'drill site' ache than the original osteoid osteoma night pain. |
|
Day 1–3 |
Procedure Site Soreness Soreness and mild swelling at the skin entry point and surrounding bone. The characteristic osteoid osteoma night pain often begins improving from Day 1 after successful ablation — some patients notice it is gone on the first night. Others take 1–2 weeks for full relief. |
|
Week 1–2 |
Early Recovery Gradual resolution of procedure-site discomfort. Analgesics typically needed for 5–10 days post-procedure. For lower limb lesions, crutches or restricted weight-bearing during this period. School and desk work resumable for most patients by Day 5–7. |
|
Week 2–6 |
Activity Resumption Upper limb and non-weight-bearing lesions: full activity by 2–3 weeks. Weight-bearing lesions (femur, tibia): restricted weight-bearing for 4–6 weeks to allow the ablation zone to heal and reduce fracture risk through treated cortical bone. |
|
Month 1–3 |
Maximum Pain Relief By 4–6 weeks, most patients have achieved complete relief of the original osteoid osteoma pain. If significant pain persists beyond 6 weeks, assessment with CT or MRI is warranted to evaluate for incomplete ablation. |
|
Month 3+ |
Follow-Up Assessment Clinical review with Dr. Garge at 4–6 weeks. CT or MRI at 3 months if symptoms persist or recur. A successfully ablated nidus shows progressive change on imaging — the lucent nidus fills in with new bone over 3–12 months. |
Follow-up after osteoid osteoma ablation has two purposes: to confirm successful treatment in patients who achieve expected pain relief, and to identify incomplete ablation or recurrence in those who do not. The follow-up schedule at Citi Vascular Centre, KPHB, is structured — not left to the patient to initiate.
|
Follow-Up Milestone |
What Happens |
|
4–6 week clinical review |
Dr. Garge reviews pain status, activity level, wound healing, and weight-bearing compliance. Most patients who have responded to ablation are pain-free or significantly improved at this appointment. Weight-bearing restriction is reassessed. |
|
CT or MRI at 3 months — if indicated |
Not required routinely in all patients who are pain-free. Indicated for: persistent pain; atypical post-procedure recovery; uncertain pre-treatment diagnosis; or when imaging response documentation is required. |
|
Signs of successful ablation on imaging |
The previously lucent nidus progressively fills with new bone on CT — this process takes 3–12 months. The reactive sclerosis surrounding the nidus gradually reduces over the same period. A fully healed nidus on CT correlates with clinical cure in most patients. |
|
If pain returns after initial relief |
Persistent or returning pain after a period of relief suggests residual nidus or true recurrence. CT imaging is repeated. If residual or recurrent nidus is confirmed, repeat ablation is the recommended next step — it is safe, technically feasible, and effective. |
|
If pain never improved after ablation |
Persistent pain from Day 1 after ablation without any improvement suggests either incomplete treatment or an alternative diagnosis. CT review is needed to assess nidus ablation adequacy and to reconsider the diagnosis if the nidus appears fully ablated. |
Q1: How is osteoid osteoma ablation different from surgery?
Surgical resection of an osteoid osteoma requires an open incision, bone drilling to remove the nidus and a margin of surrounding bone, general anaesthesia, wound closure, and 2–6 weeks of recovery depending on location. Ablation is percutaneous — a needle passes through the skin and bone to the nidus under CT guidance; the nidus is destroyed in place rather than removed. No open incision. No bone removed beyond the nidus. Faster recovery. No wound to care for.
Q2: How long does the osteoid osteoma ablation procedure take?
The total procedure time — from positioning to leaving the scanner — is typically 30–90 minutes for most osteoid osteomas. A simple, accessible nidus in the femoral shaft under conscious sedation may take 30–40 minutes. A complex nidus in the spine or very close to a nerve requiring cryoablation and hydrodissection under general anaesthesia may take 60–90 minutes. Add 1–3 hours of recovery room time before discharge. Dr. Garge provides a specific time estimate after reviewing the CT.
Q3: Is the ablation procedure painful?
The procedure is performed under anaesthesia — general anaesthesia or conscious sedation — so the patient does not feel the needle placement or energy delivery during the procedure. After the procedure, as the local anaesthetic wears off, most patients experience moderate aching at the treatment site. This is distinct from the original osteoid osteoma pain and settles over 5–10 days with prescribed analgesics. The characteristic night pain typically begins improving within the first 24–72 hours after successful ablation.
Q4: Why does CT guidance matter — can't the needle be placed by feel?
The nidus of an osteoid osteoma is often only 3–10mm in diameter — roughly the size of a small pea — and is embedded within cortical bone surrounded by dense reactive sclerosis. It cannot be felt by the operator and is not visible on X-ray or ultrasound with sufficient accuracy for ablation planning. CT is the only imaging modality that precisely defines the nidus position in three dimensions, confirms the needle tip within the nidus before energy delivery, and provides the post-ablation confirmation that the nidus has been adequately treated.
Q5: What is hydrodissection and when is it used?
Hydrodissection is a protective technique used when the osteoid osteoma nidus lies very close to a critical structure — a nerve, the spinal cord, or the skin surface. A dilute solution (typically dilute local anaesthetic or 5% dextrose) is injected into the tissue between the planned ablation zone and the structure requiring protection. The fluid creates a thermal buffer zone — displacing the critical structure away from the heat source during ablation. Hydrodissection is commonly used for near-neural and superficial nidus locations.
Q6: When can my child go back to school after osteoid osteoma ablation?
Most children return to school within 5–7 days after osteoid osteoma ablation. For lesions in the upper limbs, trunk, or non-weight-bearing sites, full school attendance is resumable quickly. For lower limb lesions — femur, tibia, fibula — a brief period on crutches is needed, but school attendance while on crutches is usually possible within 1–2 weeks. Sports and physical education: typically 4–6 weeks for weight-bearing bone lesions, 2–3 weeks for upper limb lesions. Dr. Garge provides written school guidance at discharge.
Q7: Can osteoid osteoma ablation be repeated if the first session is not fully successful?
Yes — repeat ablation for residual or recurrent osteoid osteoma is safe, technically feasible, and effective. Systematic review data on CT-guided RFA shows the secondary failure rate (after a repeat session) is only 3.1% — compared with 8.3% for the first session. The repeat procedure follows the same 10-step approach. It is typically technically simpler than the first session because the reactive bone sclerosis around the nidus is well-mapped from the first procedure's CT.
Q8: How do I know if my osteoid osteoma ablation was successful?
The most important measure of success is pain relief — the characteristic osteoid osteoma night pain should significantly improve or disappear within days to 4 weeks of successful ablation. Imaging (CT at 3 months if indicated) shows progressive bone infilling of the previously lucent nidus over 3–12 months. Complete absence of the original pain, confirmed by Dr. Garge at the 4–6 week clinical review, is the primary success criterion. Persistent or returning pain beyond 6 weeks warrants CT reassessment rather than reassurance.
|
Reference |
Key Finding |
|
Tordjman M et al. European Radiology. 2020. |
Systematic review — 3,023 patients. CT-guided RFA: primary success 91.7%, secondary success 96.9% after repeat. Complication rate ~3%. Established standard of practice. |
|
Martel Villagrán J et al. Skeletal Radiology. 2020. |
Systematic review of percutaneous thermal ablation across techniques — confirms high effectiveness and low complication rates for CT-guided osteoid osteoma ablation as a class. |
|
Abdalla BA et al. Systematic review. 2025. |
Microwave ablation — 143 cases. 95.8% clinical success. Comparable to RFA in outcomes. Growing evidence for MWA as an equivalent alternative. |
|
Comparative RFA vs MWA study. 2024. |
Direct comparison of CT-guided RFA and microwave ablation. No significant difference in clinical success. Supports individualised technique selection based on lesion characteristics. |
Citi Vascular Centre, KPHB Colony, Road No. 1, Hyderabad — CT-guided osteoid osteoma ablation for patients from Hyderabad and outstation:
Kukatpally and KPHB — 5 min | Miyapur and Bachupally — 10 min
Hitech City, Ameerpet and Madhapur — 20 min | Gachibowli and Banjara Hills — 25 min
Secunderabad and Begumpet — 25 min | Telangana, Andhra Pradesh — outstation welcome
|
Centre |
Contact |
Appointments |
|
Citi Vascular Centre |
+91-73375 83901 |
KPHB Colony, Road No. 1, Hyderabad 500072 | Mon–Sat 9AM–6PM |
|
|
73375 83901 |
Send recent CT scan for advance nidus review before booking | Outstation patients: CT review before travel |
Osteoid osteoma ablation is a well-structured, 10-step CT-guided procedure in which the pain-causing nidus of the benign bone lesion is precisely destroyed using radiofrequency, microwave, or cryo energy delivered through a percutaneous needle — without open surgery, without bone resection beyond the nidus, and without a wound requiring stitches. CT imaging is integral at every stage — from planning the needle approach on the pre-procedure scan, through stepwise guidance during bone penetration, to the critical nidus confirmation step that must be completed before any energy is delivered, to the post-ablation check that confirms treatment adequacy before the patient leaves the scanner.
Recovery is faster than open surgery — most patients return to school or desk work within a week, with weight-bearing restrictions for lower limb lesions of 4–6 weeks. The characteristic osteoid osteoma night pain typically begins improving within 24–72 hours of successful ablation. Where the first session is incomplete, repeat ablation is safe and reduces the failure rate to 3.1%. At Citi Vascular Centre, KPHB Colony, Hyderabad, Dr. Shaileshkumar Garge performs CT-guided thermal ablation for osteoid osteoma using RFA, microwave ablation, and supplementary techniques including cryoablation and hydrodissection for complex or nerve-adjacent lesions. WhatsApp your CT scan to 73375 83901 or call +91-73375 83901 to book a consultation.
Osteoid Osteoma Ablation — CT-Guided | RFA | Microwave | Cryoablation
10-Step Procedure | Same-Day Discharge | No Open Surgery | Pain Relief Within Days
Dr. Shaileshkumar Garge | FRCR (UK) | FNVIR (CMC Vellore) | EBIR (Spain) | 12+ Years | 15,000+ Procedures
Call +91-73375 83901 | WhatsApp 73375 83901 | citivascularcentre.com
Citi Vascular Centre, KPHB Colony, Hyderabad | Mon–Sat 9AM–6PM | Outstation Welcome
Book your Appointment here: | Appoinment: |Call +91-7032508468| Whatsapp:+91-7337583901